In addition to accepting email notification that you have been granted access to a notebook, you can also establish links to shared notebooks if you have been granted access, by using the Link to Shared Notebook dialog. For example, this may be the case when you organization has public notebooks that you want to view.
Note: The access privileges you have are set by the grantor.
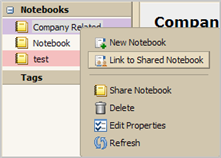
In Documents, right-click on the Notebooks header and select Link to Shared Notebook. A dialog opens.
To add the shared notebook link, you must know the email address of the owner and the name of the notebook. For example, Jdoe@example.com created a notebook called Projects with second notebook under Projects called Project 1. Jdoe then shares Project 1 with you. In order to access Project 1, enter the information as follows:
Email: jdoe@example.com
Path: projects/project1
Name: The name autocompletes with the email name and the path. You can change this.
Color: Select a color from the list (optional)
Click OK. The notebook is added to your Notebooks list.