When you schedule meetings, you can view attendees, location and resource schedules as you set up the meeting. To see the free/busy schedules, open an Appointment and click the Schedule tab.
In the first column, select the type of object to schedule - attendee, location, or resource. In the next column enter names and email addresses. Availability appears in horizontal bars next to the names, if the schedule is known.
The free/busy information shows whether the attendee is busy, out of office, tentatively busy, or free.
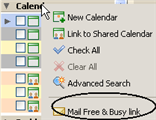
You can email a link of your free/busy status that shows appointments in your personal and shared calendars. Right-click on the Calendar heading and select Mail Free Busy link.
The compose email window opens with the link in the text area. Finish and send the email. The recipient can click on the link to view your schedule.